웹 스크래핑을 어느 정도 해본 적이 있다면, 지오펜스나 IP 차단으로 접근이 차단된 웹사이트를 경험해 보셨을 것입니다. 프록시 서버는 이러한 상황을 해결하는 데 도움을 주며, 사용자의 실제 신원을 숨기고 접근이 금지된 리소스에 대한 권한을 부여합니다.
Rust 프록시 서버를 사용하면 다음 작업을 쉽게 수행할 수 있습니다:
- IP 차단 회피: 새로운 프록시 IP로 차단 조치를 우회하고 스크래핑을 재개하세요.
- 지리적 차단을 우회: 다른 국가의 콘텐츠에 관심이 있다면, 현지 프록시가 일시적인 온라인 시민권을 부여하여 제한된 콘텐츠에 접근할 수 있게 합니다.
- 익명성 확보: 프록시 서버는 실제 IP 주소를 숨겨 사생활을 보호합니다.
이것은 빙산의 일각에 불과합니다! Rust의 강력한 라이브러리와 견고한 구문은 프록시 설정 및 관리를 매우 쉽게 만듭니다. 이 글에서는 프록시 서버에 관한 모든 것과 Rust에서 웹 스크래핑을 위한 프록시 서버 사용법을 배울 수 있습니다.
Rust에서 프록시 서버 사용하기
Rust에서 프록시 서버를 사용하려면 먼저 설정해야 합니다. 이 튜토리얼에서는 로컬 머신의 Nginx 서버에 프록시를 설정하고, Rust 바이너리에서 스크래핑 샌드박스(예: https://toscrape.com/)로 스크래핑 요청을 전송하는 방법을 다룹니다.
먼저 로컬 시스템에 Nginx를 설치하세요. Linux의 경우 Homebrew를 사용하여 다음 명령어로 설치할 수 있습니다:
sudo apt install nginx그런 다음 다음 명령어로 서버를 시작합니다:
nginx
다음으로 특정 위치에 대한 프록시 역할을 하도록 서버를 구성해야 합니다. 예를 들어, / 위치에 대한 프록시로 작동하도록 구성하고 처리하는 각 요청에 헤더(예: X-Proxy-Server)를 추가할 수 있습니다. 이를 위해 nginx.conf 파일을 편집해야 합니다.
파일 위치는 호스트 운영 체제에 따라 다릅니다. 자세한 내용은 Nginx 문서를 참조하세요. Linux에서는 /etc/nginx/nginx.conf에서 찾을 수 있습니다. 파일을 열고 파일 내 http.server 객체에 다음 코드 블록을 추가하세요:
http {
    server {

        # 다음 블록 추가
        location / {
            resolver 8.8.8.8;
            proxy_pass http://$http_host$request_uri;
            proxy_set_header 'X-Proxy-Server' 'Nginx';
        }

    }
}
이렇게 하면 모든 들어오는 요청을 원래 URL로 전달하면서 요청에 헤더를 추가하도록 프록시가 구성됩니다. 대상 서버의 로그에 접근할 수 있다면 이 헤더를 확인하여 요청이 프록시를 통해 왔는지 아니면 클라이언트에서 직접 왔는지 확인할 수 있습니다.
이제 다음 명령어를 실행하여 Nginx 서버를 재시작하세요:
nginx -s reload
이제 이 서버는 스크래핑을 위한 포워드 프록시로 사용할 준비가 되었습니다.
Rust로 웹 스크래핑 프로젝트 만들기
새로운 스크래핑 프로젝트를 설정하려면 다음 명령어를 실행하여 Cargo를 사용해 새로운 Rust 바이너리를 생성하세요:
cargo new rust-scraper
프로젝트 생성 후 세 개의 크레이트를 추가해야 합니다. 먼저 reqwest와 scraper를 추가합니다. reqwest는 대상 리소스에 요청을 보내는 데 사용되며, scraper는 reqwest가 수신한 HTML에서 필요한 데이터를 추출하는 데 사용됩니다. 그런 다음 세 번째 크레이트인 tokio를 추가하여 reqwest를 통한 비동기 네트워크 호출을 처리합니다.
설치를 위해 프로젝트 디렉터리 내에서 다음 명령어를 실행하세요:
cargo add scraper reqwest tokio --features "reqwest/blocking tokio/full"
다음으로 src/main.rs 파일을 열고 다음 코드를 추가합니다:
use reqwest;
use std::error::Error;

#[tokio::main]
async fn main()  -> Result<(), Box<dyn Error>>{
    let url = "http://books.toscrape.com/";

    let client = reqwest::Client::new();

    let response = client
        .get(url)
        .send()
        .await?;

    let html_content = response.text().await?;

    extract_products(&html_content);

    Ok(())
}

fn extract_products(html_content: &str) {

    let document = scraper::Html::parse_document(&html_content);

    let html_product_selector = scraper::Selector::parse("article.product_pod").unwrap();
    let html_products = document.select(&html_product_selector);

    let mut products: Vec<Product> = Vec::new();

    for html_product in html_products {
        let url = html_product
            .select(&scraper::Selector::parse("a").unwrap())
            .next()
            .and_then(|a| a.value().attr("href"))
            .map(str::to_owned);
        let image = html_product
            .select(&scraper::Selector::parse("img").unwrap())
            .next()
            .and_then(|img| img.value().attr("src"))
            .map(str::to_owned);
        let name = html_product
            .select(&scraper::Selector::parse("h3").unwrap())
            .next()
            .map(|title| title.text().collect::<String>());
        let price = html_product
            .select(&scraper::Selector::parse(".price_color").unwrap())
            .next()
            .map(|price| price.text().collect::<String>());

        let product = Product {
            url,
            image,
            name,
            price,
        };
        products.push(product);
    }

    println!("{:?}", products);
}


#[derive(Debug)]
struct Product {
    url: Option<String>,
    image: Option<String>,
    name: Option<String>,
    price: Option<String>,
}
이 코드는 reqwest 크레이트를 사용하여 클라이언트를 생성하고 https://books.toscrape.com URL의 웹 페이지를 가져옵니다. 그런 다음 extract_products라는 함수 내에서 페이지의 HTML을 처리하여 페이지에서 제품 목록을 추출합니다. 추출 로직은 scraper 크레이트를 사용하여 구현되며 프록시 사용 여부와 관계없이 동일하게 유지됩니다.
이제 이 바이너리를 실행하여 제품 목록을 올바르게 추출하는지 확인해 볼 차례입니다. 다음 명령어를 실행하세요:
cargo run
터미널에 다음과 유사한 출력이 표시됩니다:
Finished dev [unoptimized + debuginfo] target(s) in 0.80s
     Running `target/debug/rust_scraper`
[Product { url: Some("catalogue/a-light-in-the-attic_1000/index.html"), image: Some("media/cache/2c/da/2cdad67c44b002e7ead0cc35693c0e8b.jpg"), name: Some("A Light in the ..."), price: Some("£51.77") }, Product { url: Some("catalogue/tipping-the-velvet_999/index.html"), image: Some("media/cache/26/0c/260c6ae16bce31c8f8c95daddd9f4a1c.jpg"), name: Some("Tipping the Velvet"), price: Some("£53.74") }, Product { url: Some("catalogue/soumission_998/index.html"), image: Some("media/cache/3e/ef/3eef99c9d9adef34639f510662022830.jpg"), name: Some("Soumission"), price: Some("£50.10") }, Product { url: Some("catalogue/sharp-objects_997/index.html"), image: Some("media/cache/32/51/3251cf3a3412f53f339e42cac2134093.jpg"), name: Some("Sharp Objects"), price: Some("£47.82") }, Product { url: Some("catalogue/sapiens-a-brief-history-of-humankind_996/index.html"), image: Some("media/cache/be/a5/bea5697f2534a2f86a3ef27b5a8c12a6.jpg"), name: Some("Sapiens: A Brief History ..."), price: Some("£54.23") }, Product { url: Some("catalogue/the-requiem-red_995/index.html"), image: Some("media/cache/68/33/68339b4c9bc034267e1da611ab3b34f8.jpg"), name: Some("레퀴엠 레드"), price: Some("£22.65") }, Product { url: Some("catalogue/the-dirty-little-secrets-of-getting-your-dream-job_994/index.html"), image: Some("media/cache/92/27/92274a95b7c251fea59a2b8a78275ab4.jpg"), name: Some("더티 리틀 시크릿스 ..."), price: Some("£33.34") }, Product { url: Some("catalogue/the-coming-woman-a-novel-based-on-the-life-of-the-infamous-feminist-victoria-woodhull_993/index.html"), image: Some("media/cache/3d/54/3d54940e57e662c4dd1f3ff00c78cc64.jpg"), name: Some("다가오는 여성: A ..."), price: Some("£17.93") }, Product { url: Some("catalogue/the-boys-in-the-boat-nine-americans-and-their-epic-quest-for-gold-at-the-1936-berlin-olympics_992/index.html"), image: Some("media/cache/66/88/66883b91f6804b2323c8369331cb7dd1.jpg"), name: Some("보트 위의 소년들: 1936년 베를린 올림픽에서 금메달을 향한 아홉 미국인의 장대한 도전_992/index.html"), price: Some("£22.60") }, Product { url: Some("catalogue/the-black-maria_991/index.html"), image: Some("media/cache/58/46/5846057e28022268153beff6d352b06c.jpg"), name: Some("검은 마리아"), price: Some("£52.15") }, Product { url: Some("catalogue/starving-hearts-triangular-trade-trilogy-1_990/index.html"), image: Some("media/cache/be/f4/bef44da28c98f905a3ebec0b87be8530.jpg"), name: Some("Starving Hearts (Triangular Trade ..."), price: Some("£13.99") }, Product { url: Some("catalogue/shakespeares-sonnets_989/index.html"), image: Some("media/cache/10/48/1048f63d3b5061cd2f424d20b3f9b666.jpg"), name: Some("Shakespeare's Sonnets"), price: Some("£20.66") }, Product { url: Some("catalogue/set-me-free_988/index.html"), image: Some("media/cache/5b/88/5b88c52633f53cacf162c15f4f823153.jpg"), name: Some("Set Me Free"), price: Some("£17.46") }, Product { url: Some("catalogue/scott-pilgrims-precious-little-life-scott-pilgrim-1_987/index.html"), image: Some("media/cache/94/b1/94b1b8b244bce9677c2f29ccc890d4d2.jpg"), name: Some("Scott Pilgrim's Precious Little ..."), price: Some("£52.29") }, Product { url: Some("catalogue/rip-it-up-and-start-again_986/index.html"), image: Some("media/cache/81/c4/81c4a973364e17d01f217e1188253d5e.jpg"), name: Some("Rip it Up and ..."), price: Some("£35.02") }, Product { url: Some("catalogue/our-band-could-be-your-life-scenes-from-the-american-indie-underground-1981-1991_985/index.html"), image: Some("media/cache/54/60/54607fe8945897cdcced0044103b10b6.jpg"), name: Some("Our Band Could Be ..."), price: Some("£57.25") }, Product { url: Some("catalogue/olio_984/index.html"), image: Some("media/cache/55/33/553310a7162dfbc2c6d19a84da0df9e1.jpg"), name: Some("Olio"), price: Some("£23.88") }, Product { url: Some("catalogue/mesaerion-the-best-science-fiction-stories-1800-1849_983/index.html"), image: Some("media/cache/09/a3/09a3aef48557576e1a85ba7efea8ecb7.jpg"), name: Some("Mesaerion: The Best Science ..."), price: Some("£37.59") }, Product { url: Some("catalogue/libertarianism-for-beginners_982/index.html"), image: Some("media/cache/0b/bc/0bbcd0a6f4bcd81ccb1049a52736406e.jpg"), name: Some("초보자를 위한 자유지상주의"), price: Some("£51.33") }, Product { url: Some("catalogue/its-only-the-himalayas_981/index.html"), image: Some("media/cache/27/a5/27a53d0bb95bdd88288eaf66c9230d7e.jpg"), name: Some("It's Only the Himalayas"), price: Some("£45.17") }]
이는 스크래핑 로직이 정상적으로 작동함을 의미합니다. 이제 이 스크레이퍼에 Nginx 프록시를 추가할 준비가 되었습니다.
프록시 활용하기
스크래핑 요청이 main() 함수 내에서 일회성 get 호출 대신 완전한 reqwest 클라이언트를 통해 전송된다는 점을 확인할 수 있습니다. 이는 클라이언트 생성 시 프록시를 쉽게 구성할 수 있음을 의미합니다.
클라이언트를 구성하려면 다음 코드 줄을 업데이트하세요:
async fn main()  -> Result<(), Box<dyn Error>>{
    let url = "https://books.toscrape.com/";

    # 이 줄을 교체
    let client = reqwest::Client::new();

    # 이 줄로 변경
    let client = reqwest::Client::builder()
    .proxy(reqwest::Proxy::https("http://localhost:8080")?)
    .build()?;

    //...

    Ok(())
}
reqwest를사용해 프록시를 구성할 때, 일부 프록시 제공업체(Bright Data 포함)는http와https구성 모두에서 작동하지만 추가 설정이 필요할 수 있다는 점을 이해하는 것이 중요합니다.https사용 시 문제가 발생하면http로전환하여 앱을 실행해 보세요.
이제 cargo run 명령어로 바이너리를 다시 실행해 보세요. 이전과 유사한 응답을 받아야 합니다. 다만 Nginx 서버 로그를 확인하여 요청이 프록시 처리되었는지 반드시 확인하세요.
운영 체제에 따른 지침을 참고하여 Nginx 서버 로그 위치를 확인하세요. Mac의 Homebrew 기반 설치 환경에서는 access 및 error 로그 파일이 /opt/homebrew/var/log/nginx 폴더에 있습니다. access.log 파일을 열면 파일 하단에 다음과 같은 행이 표시될 것입니다:
127.0.0.1 - - [07/Jan/2024:05:19:54 +0530] "GET https://books.toscrape.com/ HTTP/1.1" 200 18 "-" "-"
이는 요청이 Nginx 서버를 통해 프록시 처리되었음을 나타냅니다. 이제 원격 호스트에 서버를 설정하여 지역 제한이나 IP 차단을 우회하는 데 활용할 수 있습니다.
프록시 로테이션
웹 스크래핑 프로젝트를 진행할 때, 여러 프록시 사이를 순환해야 할 수 있습니다. 이렇게 하면 스크래핑 작업 부하를 여러 IP에 분산시켜 단일 소스나 위치에서 발생하는 높은 트래픽으로 인해 탐지되는 것을 방지할 수 있습니다.
프록시 로테이션을 구현하려면 main.rs 파일에 다음 함수를 추가해야 합니다:
#[derive(Debug)]
struct Proxy {
    ip: String,
    port: String,
}

fn get_proxies() -> Vec<Proxy> {
    let mut proxies = Vec::new();

    proxies.push(Proxy {
        ip: "http://localhost".to_string(),
        port: "8082".to_string(),
    });

    // 더 많은 프록시를 생성하려면 여기에 proxies.push 문을 추가하세요

    proxies
}
이렇게 하면 프록시 집합을 쉽게 정의할 수 있습니다. 그런 다음 무작위 프록시를 사용하려면 main 함수를 다음과 같이 업데이트해야 합니다:
#[tokio::main]
async fn main()  -> Result<(), Box<dyn Error>> {
    let url = "https://books.toscrape.com/";

    // 다음 두 줄 추가
    let proxies = get_proxies();
    let random_proxy = proxies.choose(&mut rand::thread_rng()).unwrap();

    let client = reqwest::Client::builder()
    // 다음 줄을 아래와 같이 수정
    .proxy(reqwest::Proxy::http(format!("{0}:{1}", random_proxy.ip, random_proxy.port))?)
    .build()?;

    // 나머지는 동일하게 유지
    let response = client
        .get(url)
        .send()
        .await?;

    let html_content = response.text().await?;

    extract_products(&html_content);

    Ok(())
}
이제 프록시 배열에서 프록시를 무작위로 선택하려면 rand 크레이트를 설치해야 합니다. 다음 명령어를 실행하여 설치할 수 있습니다:
cargo add rand
그런 다음 main.rs 파일 상단에 다음 줄을 추가하여 rand 크레이트를 임포트하세요:
use rand::seq::SliceRandom;
이제 cargo run 명령어로 바이너리를 다시 실행해 보세요. 이전과 동일한 출력이 표시되면 무작위 프록시 목록이 올바르게 설정된 것입니다.
Bright Data 프록시 서버
보셨듯이 프록시를 수동으로 설정하는 것은 많은 작업이 필요합니다. 또한 새 IP 주소와 위치의 모든 이점을 활용하려면 프록시 서버를 원격 서버에 호스팅해야 합니다. 이러한 번거로움을 피하고 싶다면Bright Data 프록시 서버 중 하나를 사용하는 것을 고려해 보세요.
수많은 프록시 제공업체가 존재하지만, Bright Data는 그 규모와 유연성으로 유명합니다. Bright Data를 사용하면 195개국에 걸쳐 분산된 400M+ monthly개의 주거용, 모바일, 데이터 센터 및 ISP 프록시로 구성된 방대한 네트워크를 이용할 수 있습니다. 방대한 주거용 프록시를 통해 특정 국가, 도시 또는 심지어 이동통신사를 대상으로 정밀하게 집중된 스크래핑을 수행할 수 있습니다.
또한 Bright Data 주거용 프록시는 실제 사용자 트래픽과 완벽하게 융합되며, 데이터 센터 및 모바일 옵션은 초고속 속도와 안정적인 연결을 제공합니다. Bright Data의 자동 회전 기능은 스크래핑을 유연하게 유지하여 탐지 및 차단 위험을 최소화합니다.
직접 체험해 보시려면 https://brightdata.com/ 로 이동하여 오른쪽 상단의 ‘무료 체험 시작’을 클릭하세요. 가입 후 제어판 페이지로 이동합니다:
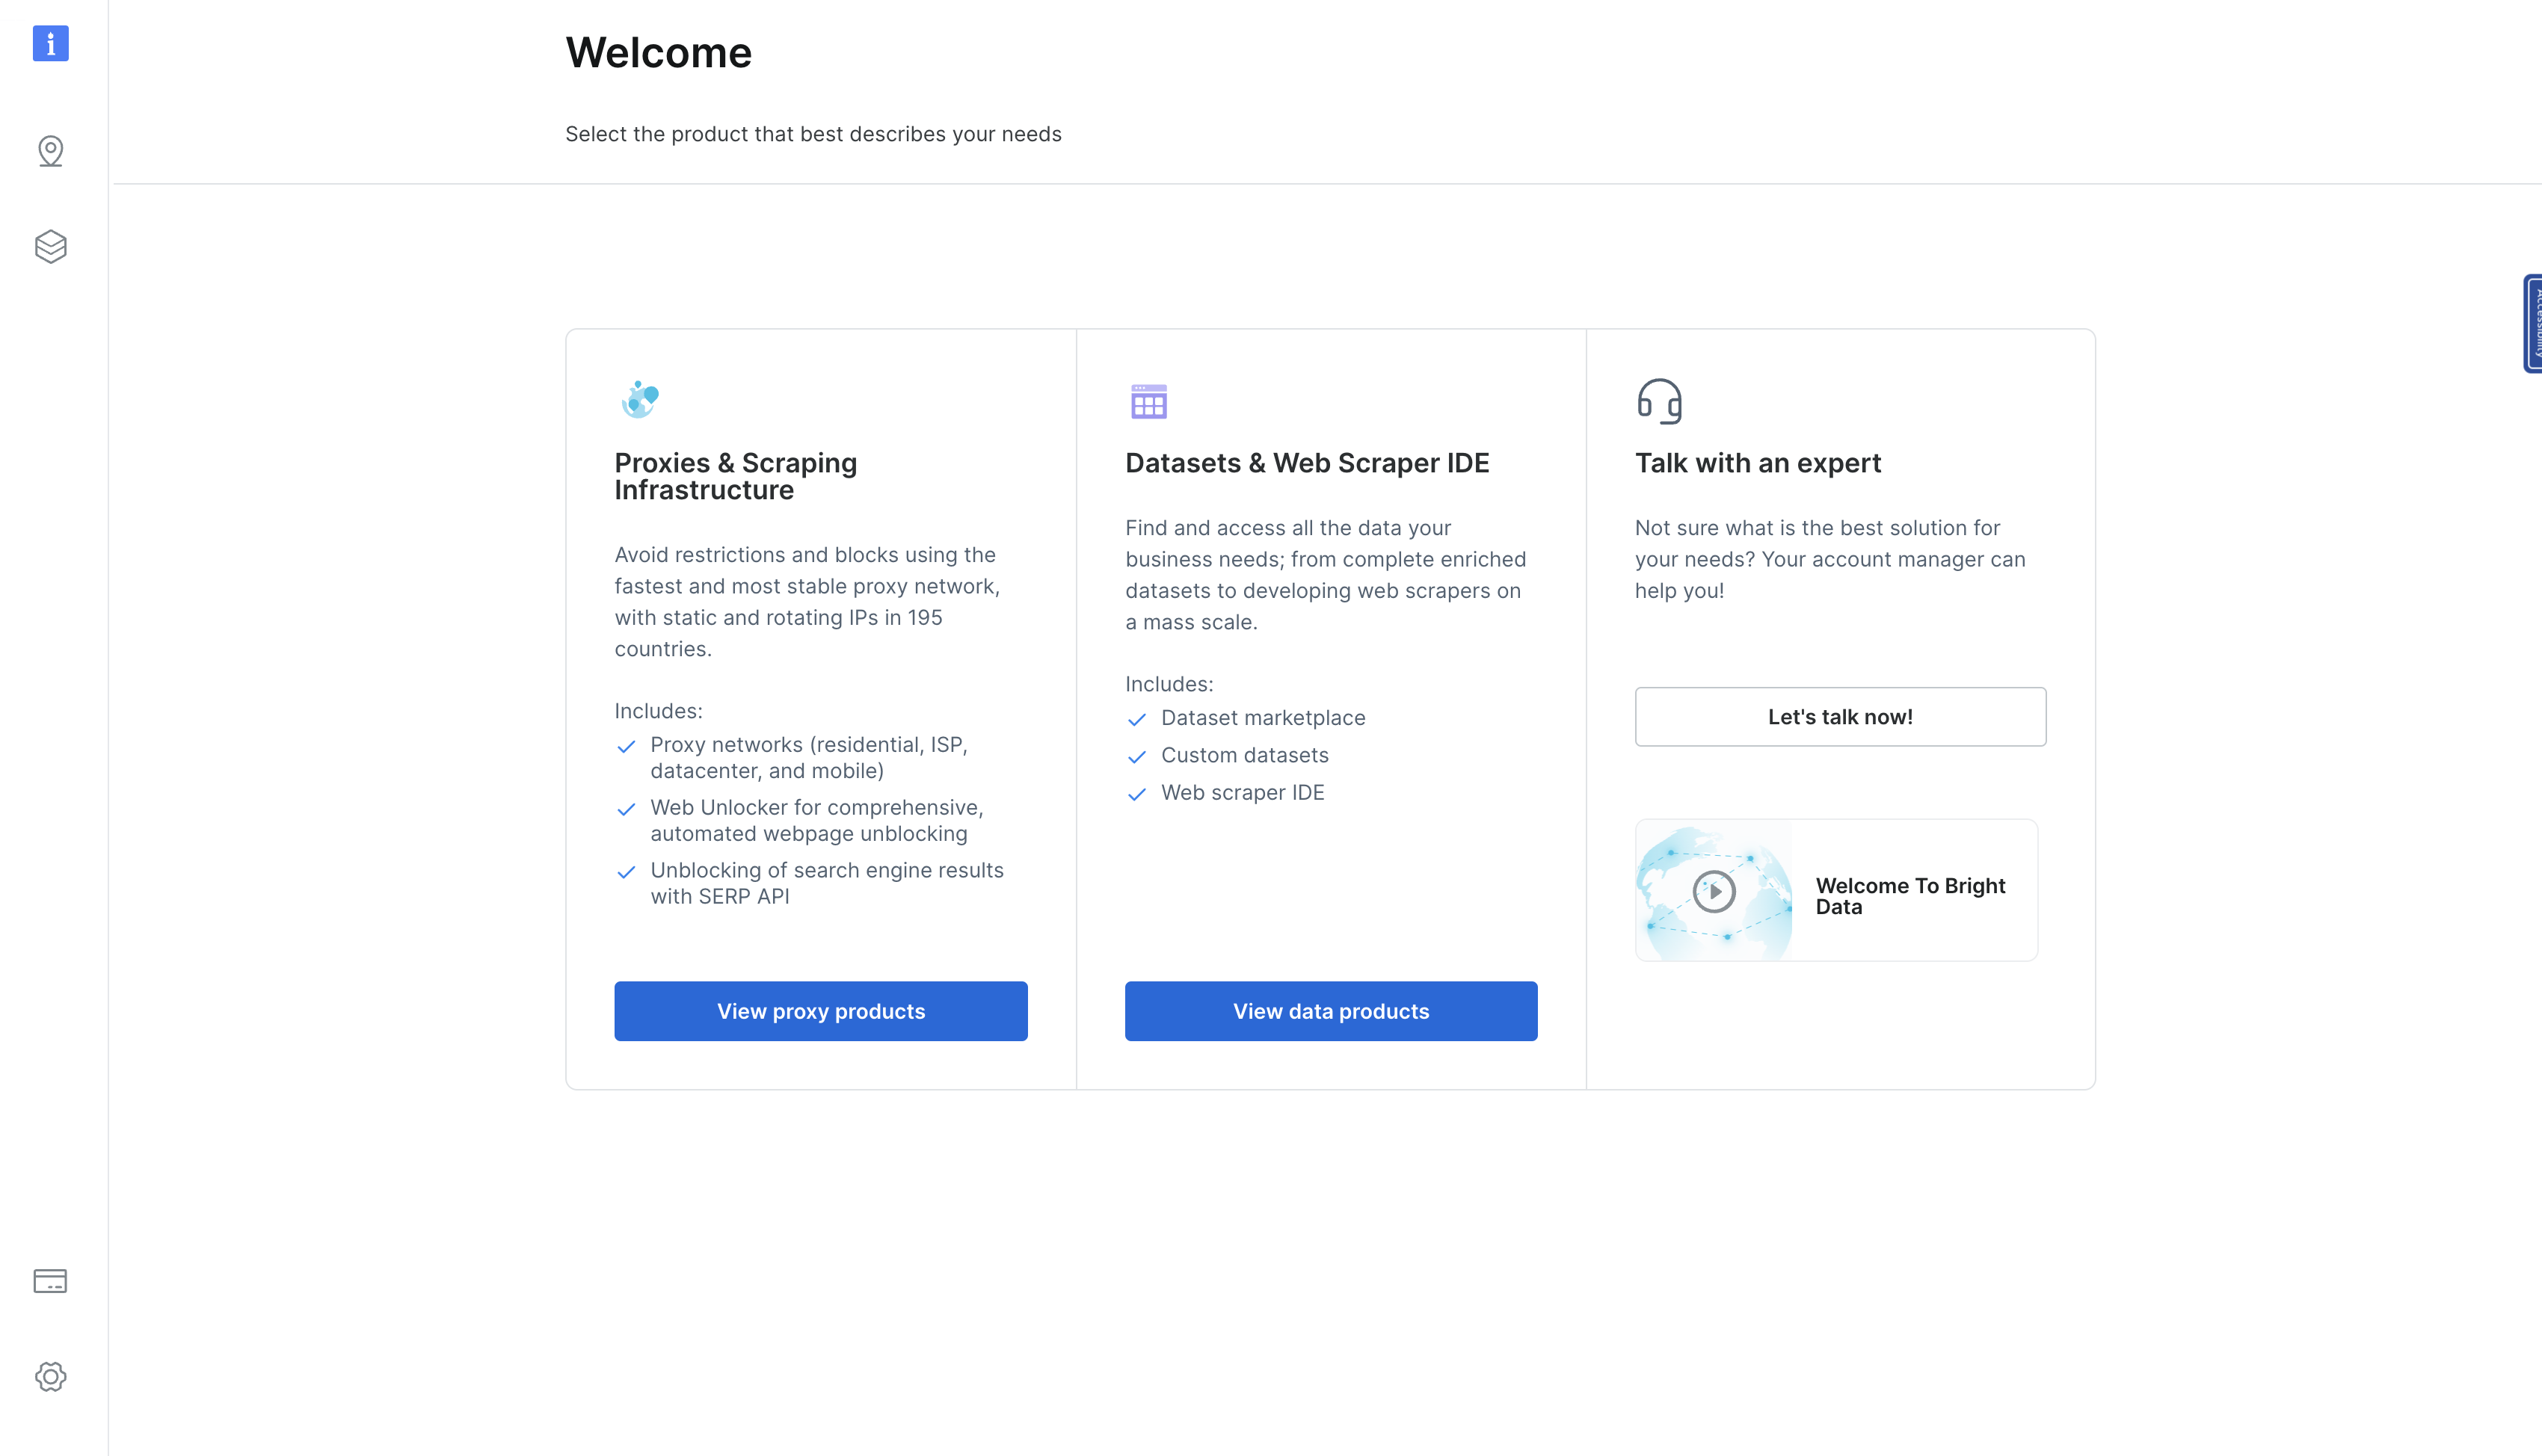
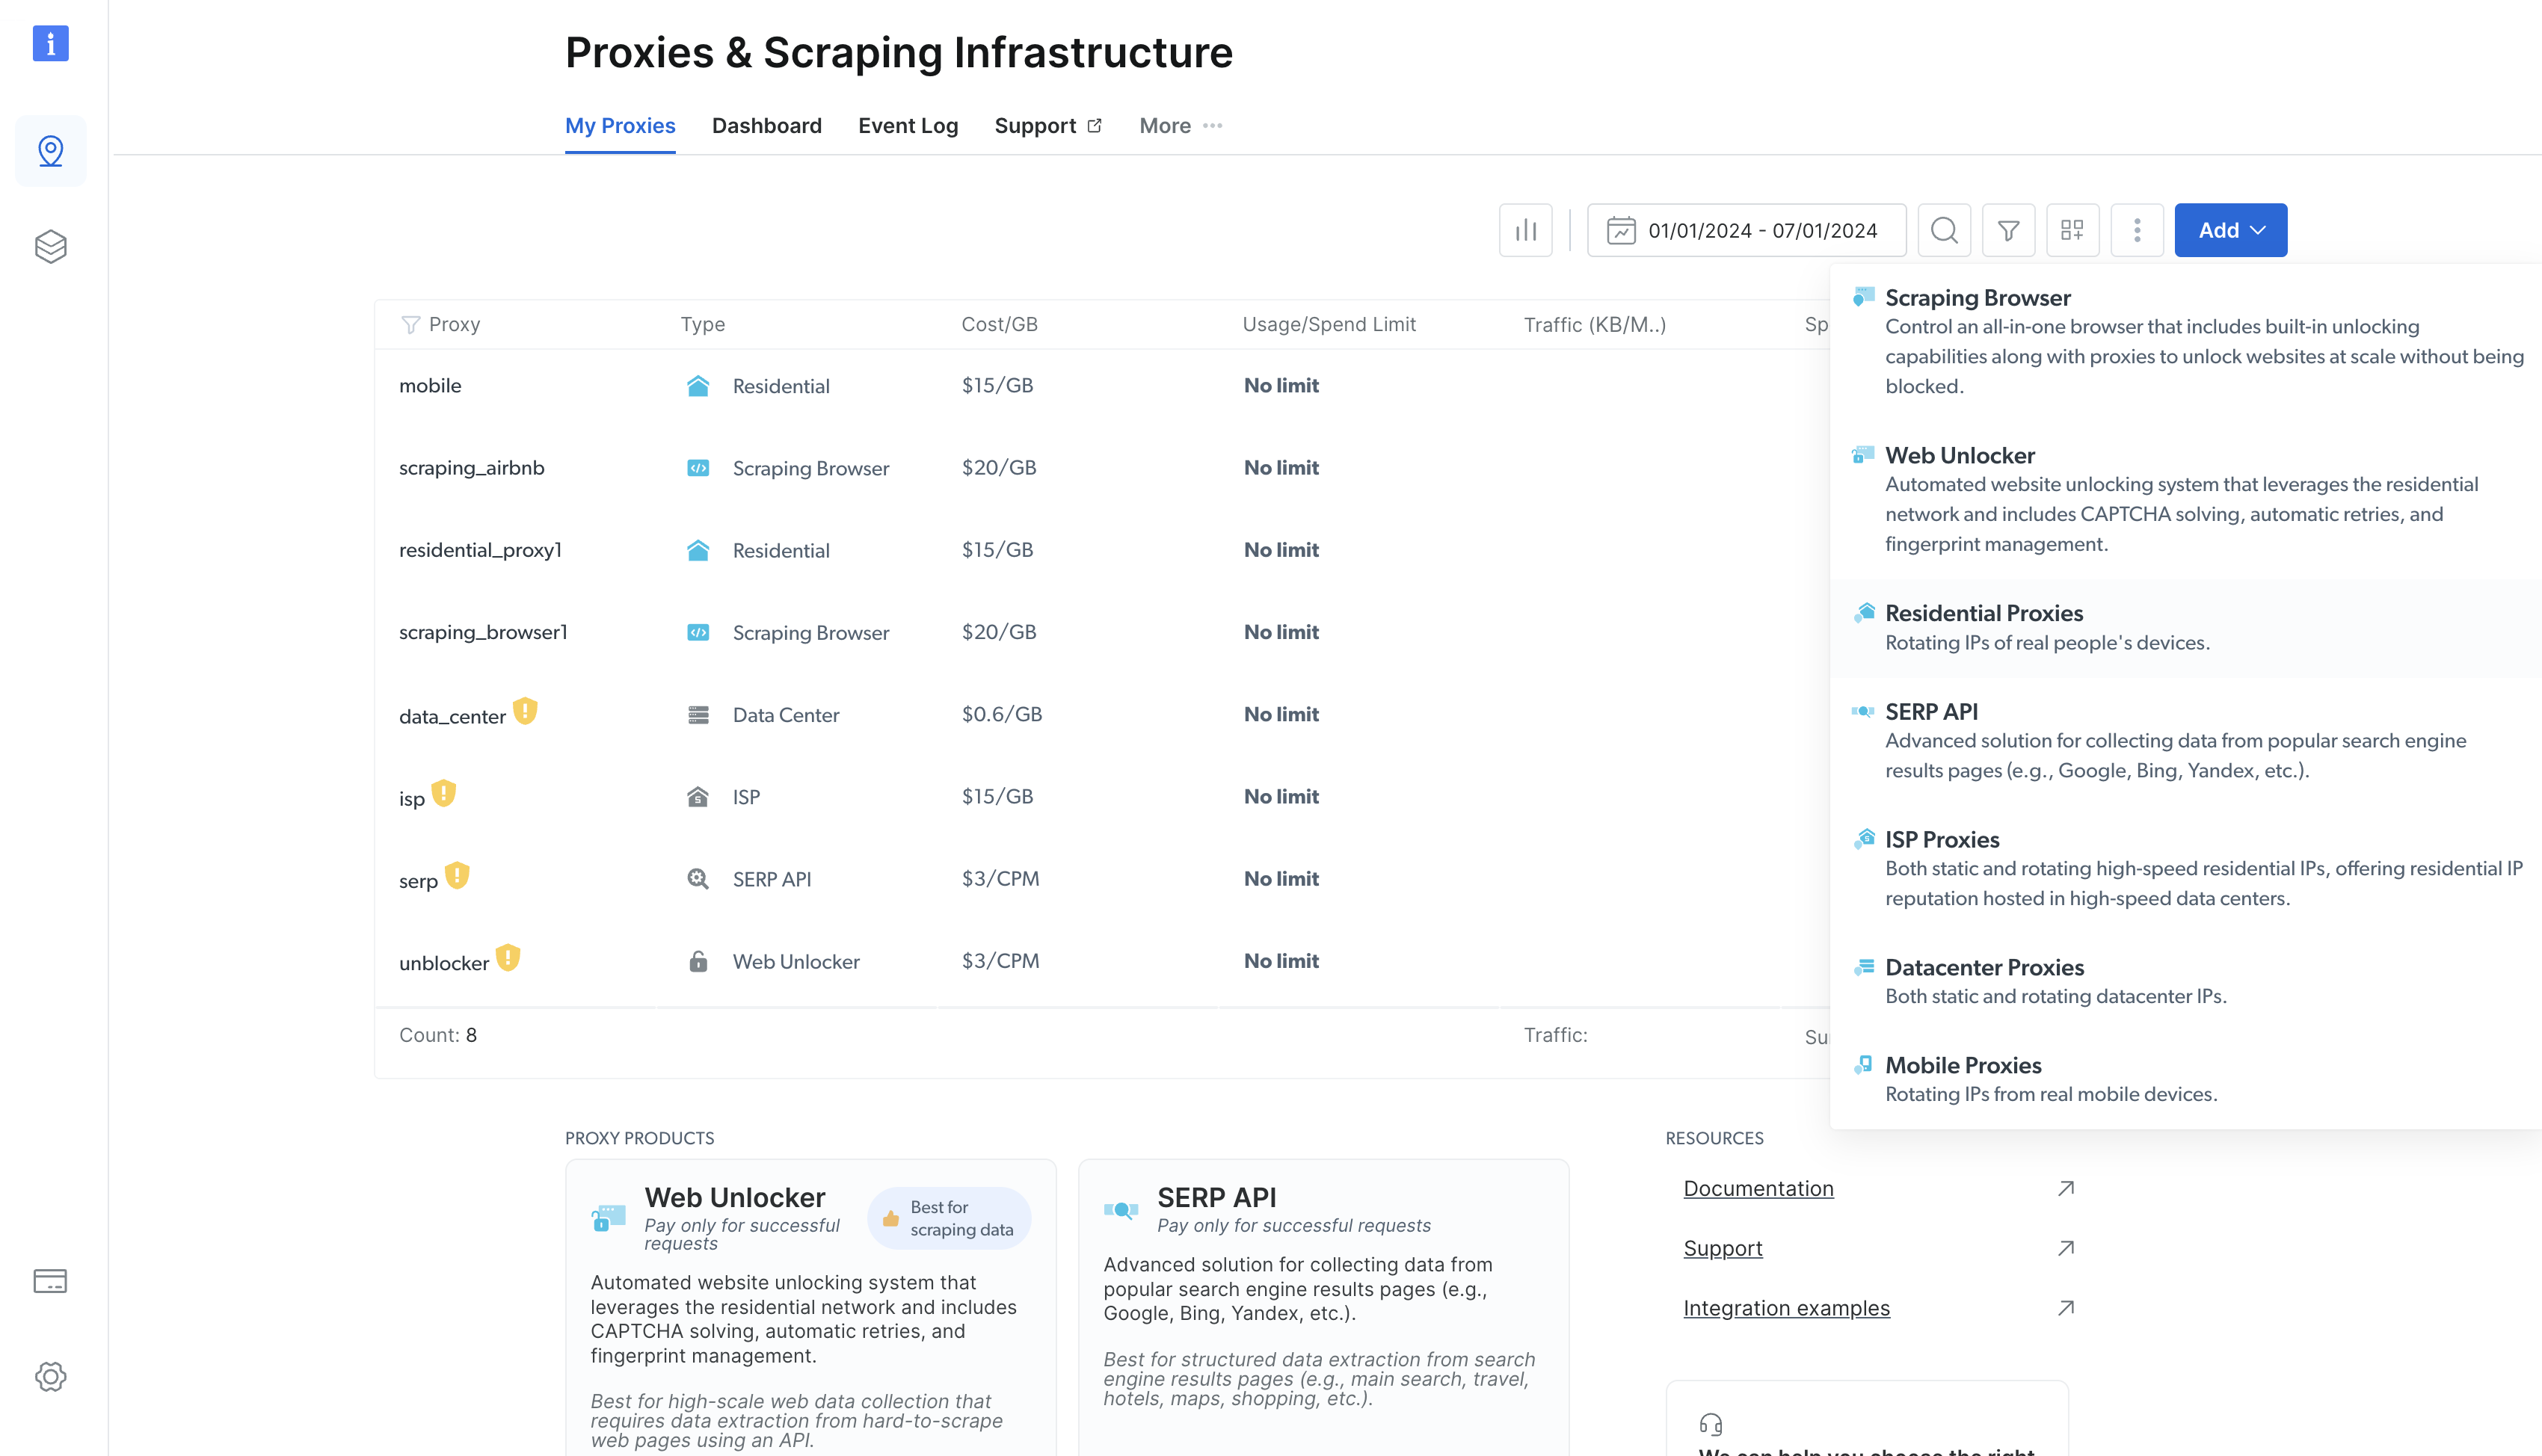
이 페이지에서 ‘프록시 제품 보기 ‘를 클릭하면 ‘프록시 및 스크래핑 인프라 ‘ 페이지로 이동합니다:
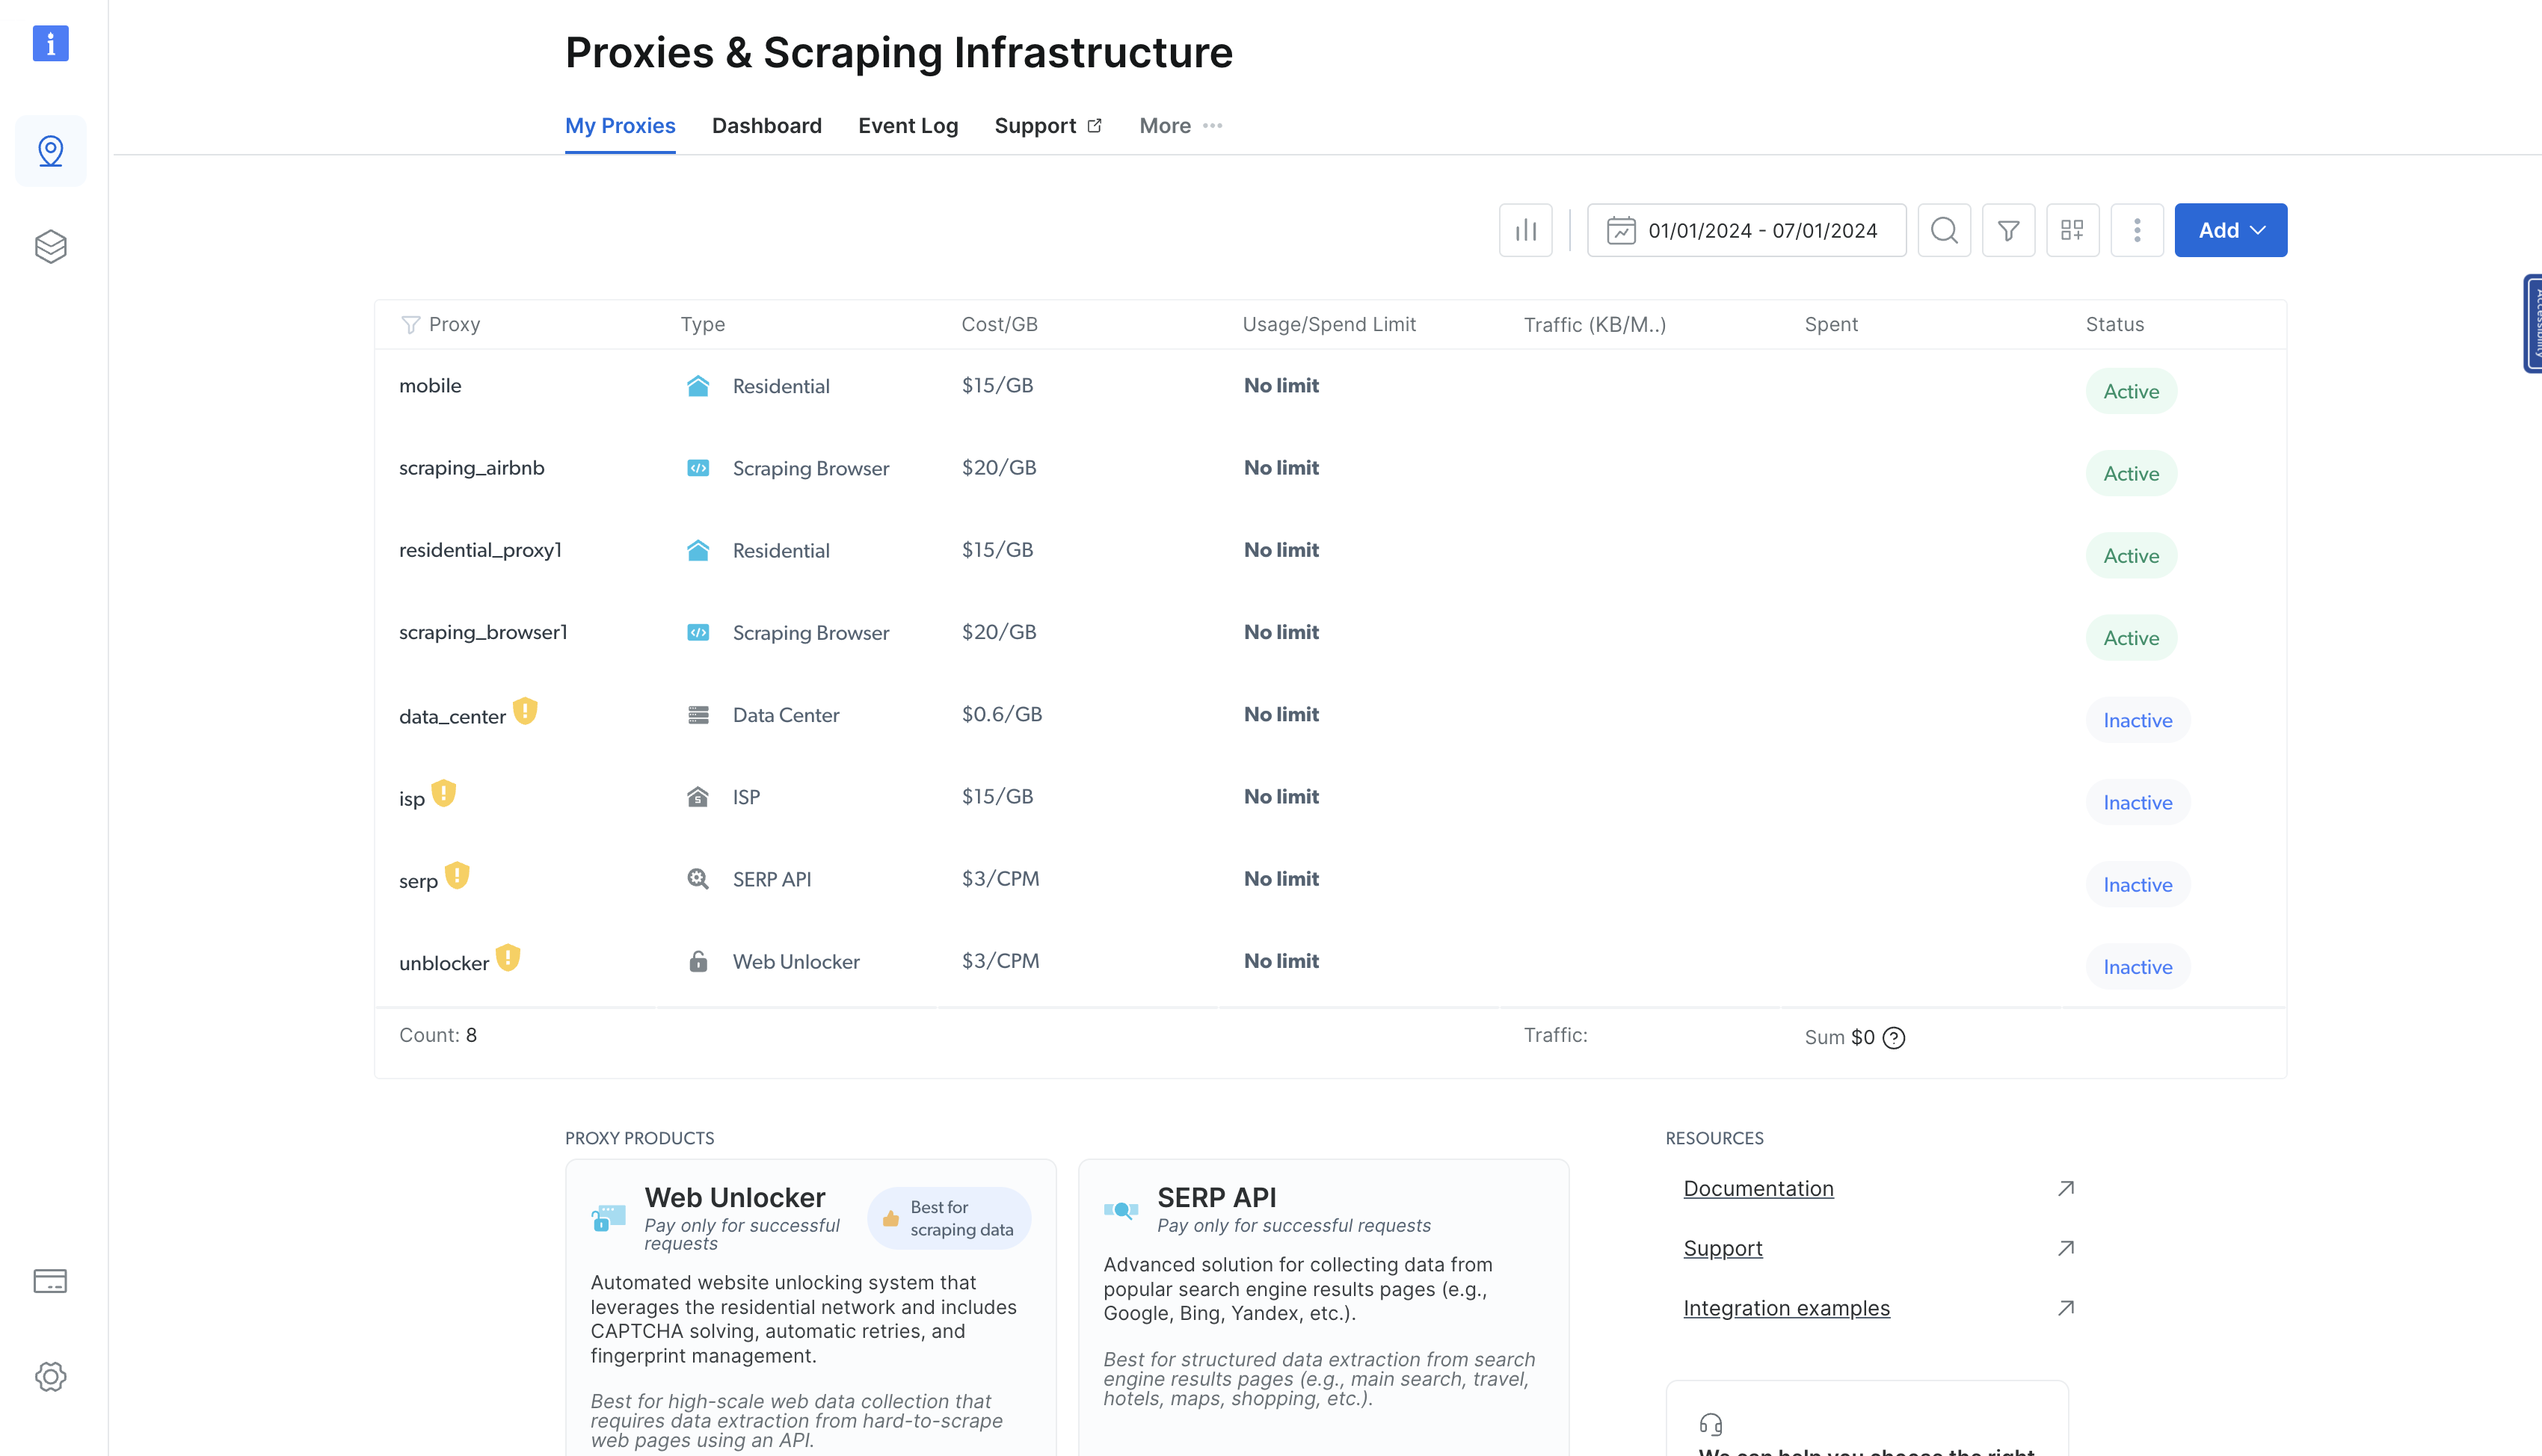
이 페이지에는 이전에 프로비저닝한 모든 프록시가 나열됩니다. 프록시를 추가하려면 오른쪽 상단의 파란색 ‘추가’ 버튼을 클릭하고 ‘주거용 프록시’를 선택하세요:
새 주거용 프록시를 구성할 수 있는 양식이 나타납니다. 기본 옵션을 유지한 상태로 페이지 하단까지 스크롤한 후 ‘추가(Add)’를 클릭하세요.
리저널 프록시가 생성되면 새로 생성된 프록시의 세부 정보가 표시된 페이지로 이동합니다. ‘액세스 매개변수’ 탭을 클릭하여 프록시의 호스트, 사용자 이름, 비밀번호를 확인하세요:
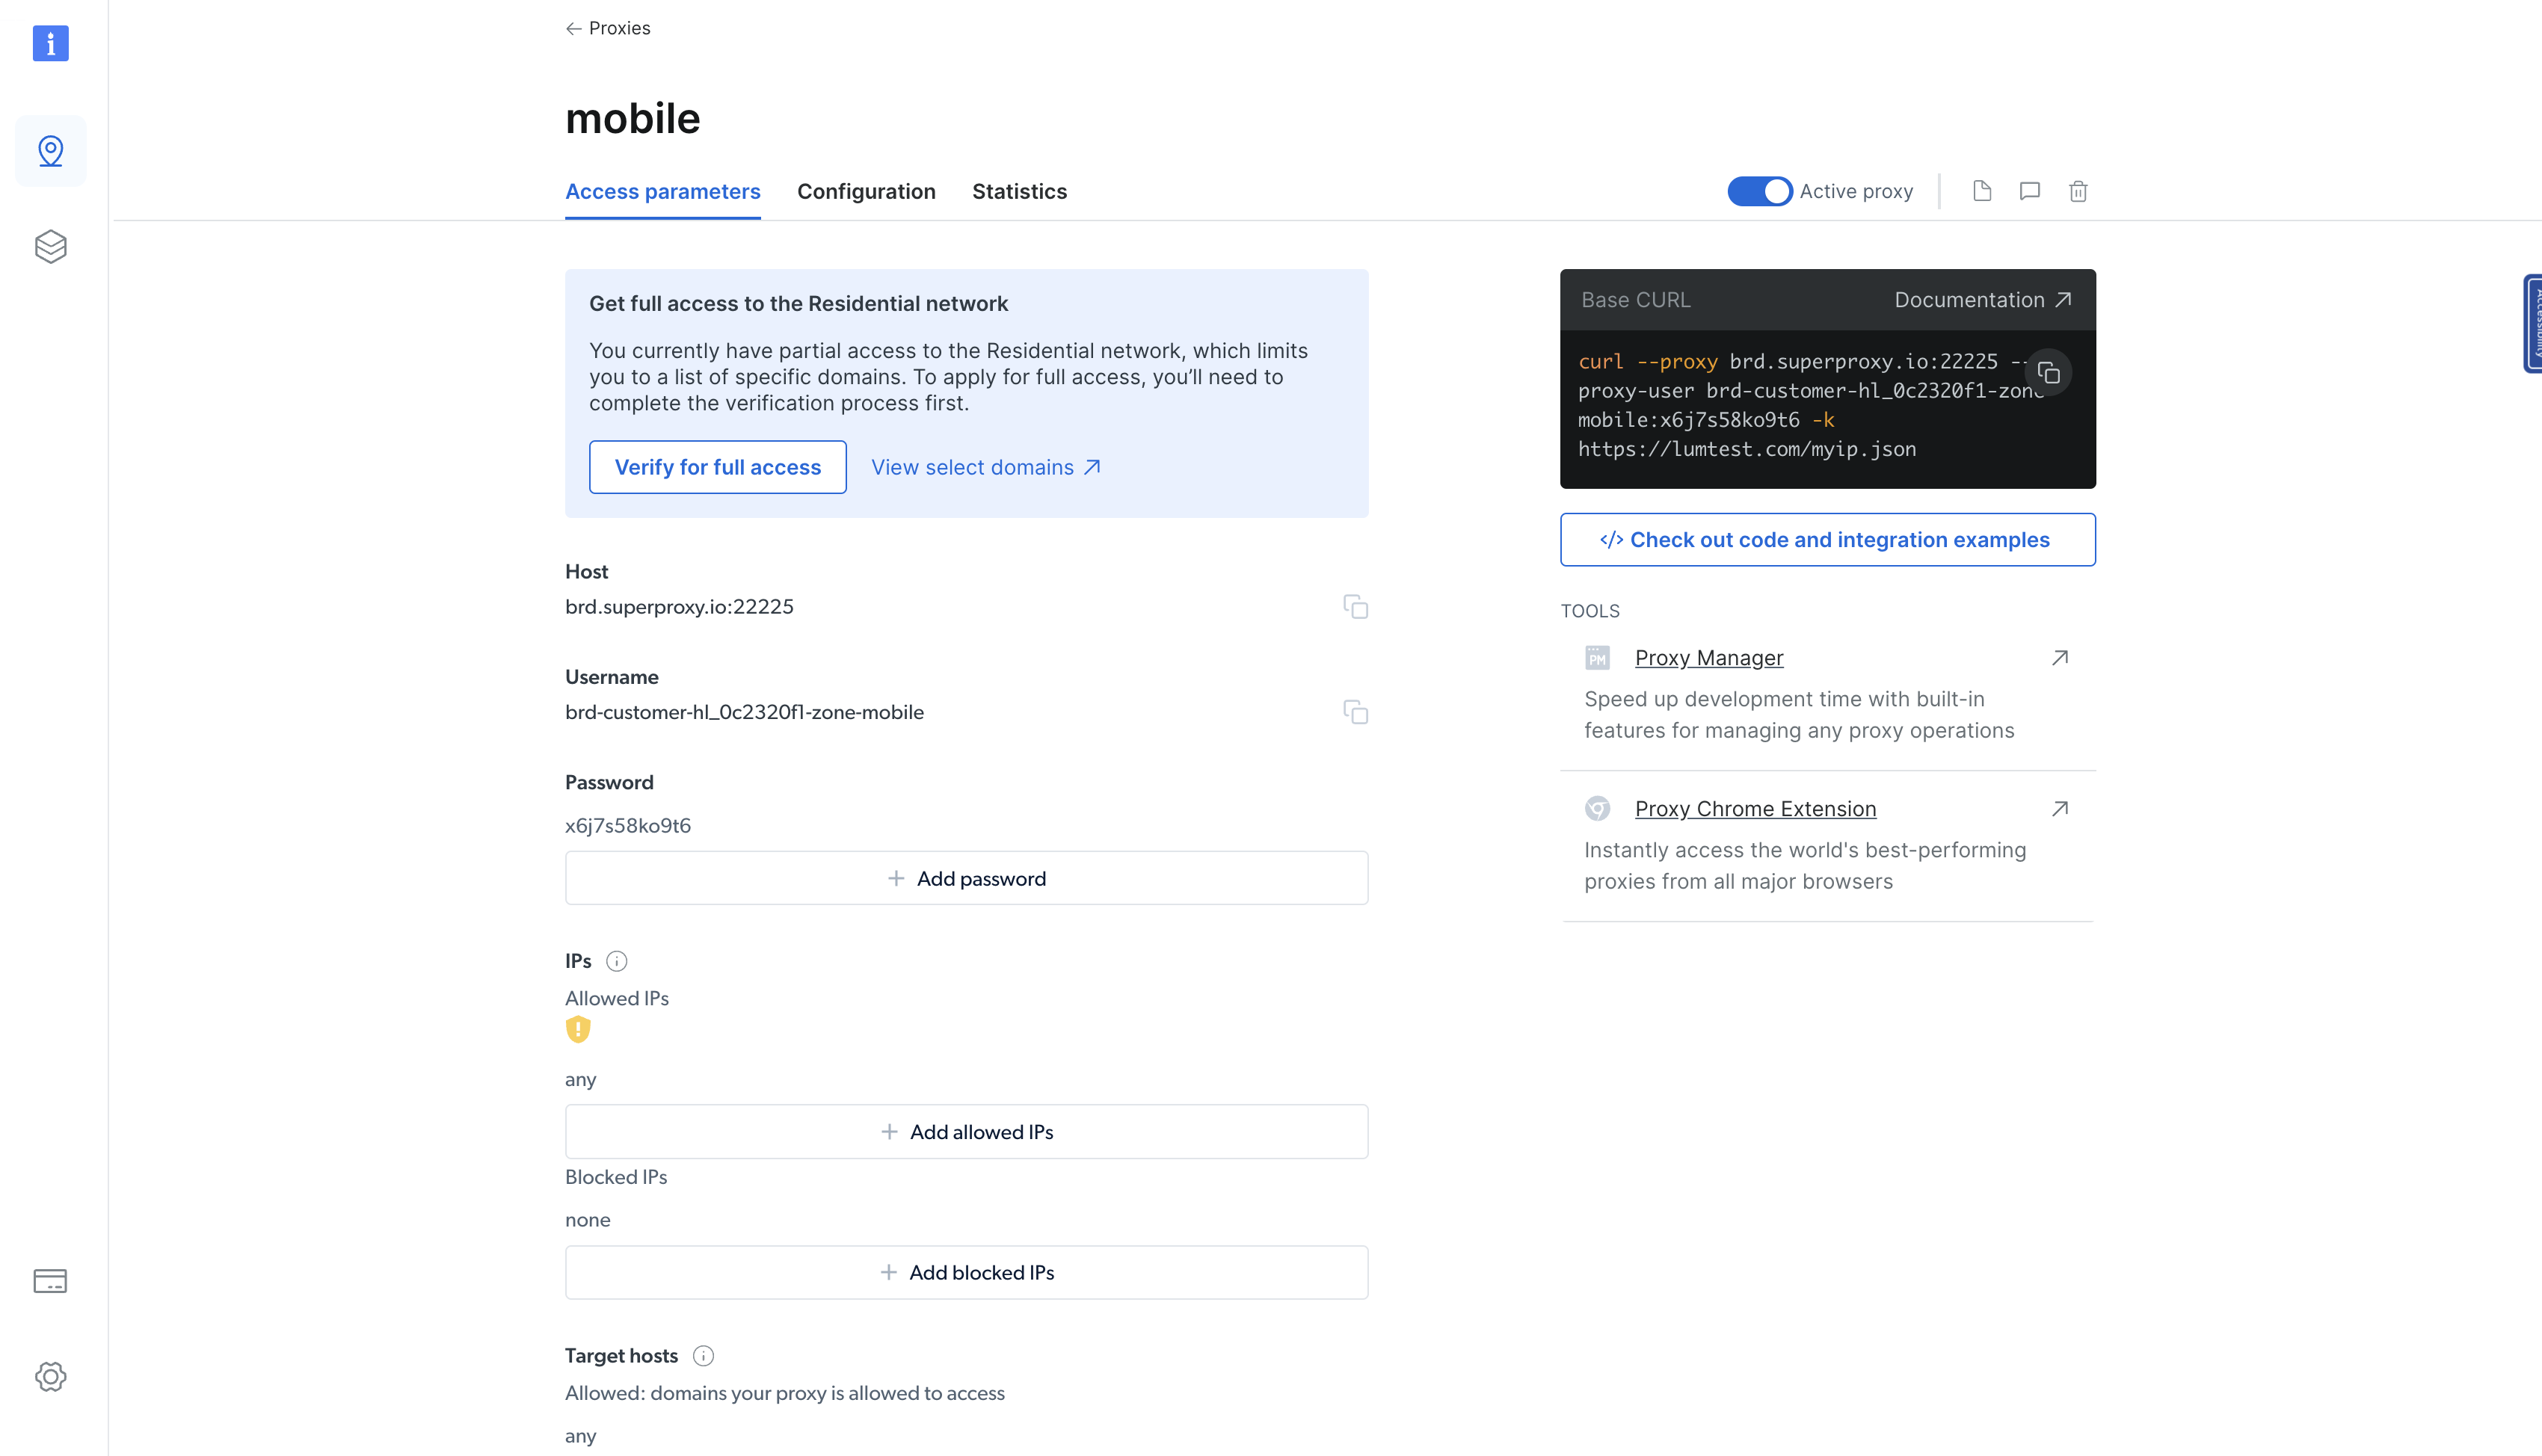
이 매개변수를 사용하여 Rust 바이너리에 프록시를 통합할 수 있습니다. 이를 위해 src/main.rs 파일의 main() 함수를 다음과 같이 업데이트하세요:
#[tokio::main]
async fn main()  -> Result<(), Box<dyn Error>> {
    let url = "https://books.toscrape.com/";

    // 다음 블록을 Bright Data 프록시 세부 정보 페이지의 내용으로 업데이트하세요
    let client = reqwest::Client::builder()
    .proxy(reqwest::Proxy::http("<BD 프록시 호스트명 & 포트>")?
    .basic_auth("<사용자 BD 사용자명>", "<사용자 BD 비밀번호>"))
    .build()?;

    // 나머지 코드는 동일하게 유지
    let response = client
        .get(url)
        .send()
        .await?;

    let html_content = response.text().await?;

    extract_products(&html_content);

    Ok(())
}
그런 다음 바이너리를 다시 실행해 보세요. 이전과 마찬가지로 응답이 정상적으로 반환될 것입니다. 여기서 유일한 핵심 차이점은 요청이 Bright Data를 통해 프록시 처리되어 사용자의 신원과 실제 위치를 숨긴다는 점입니다.
다음 코드 조각을 사용해 클라이언트의 IP 주소를 표시하는 API에 요청을 보내 이 점을 확인할 수 있습니다:
use reqwest;
use std::error::Error;


#[tokio::main]
async fn main()  -> Result<(), Box<dyn Error>> {
   let url = "http://lumtest.com/myip.json";

   // 다음 블록은 Bright Data 프록시 세부 정보 페이지의 내용으로 업데이트하세요
   let client = reqwest::Client::builder()
   .proxy(reqwest::Proxy::http("<BD 프록시 호스트명 & 포트>")?
   .basic_auth("<사용자 BD 아이디>", "<사용자 BD 비밀번호>"))
   .build()?;


   // 나머지 코드는 동일하게 유지
   let response = client
       .get(url)
       .send()
       .await?;


   let html_content = response.text().await?;

   println!("{:?}", html_content);
   Ok(())
}
cargo run 명령어로 코드를 실행하면 다음과 같은 출력이 표시됩니다:
"{"ip":"209.169.64.172","country":"US","asn":{"asnum":6300,"org_name":"CCI-TEXAS"},"geo":{"city":"Conroe","region":"TX","region_name":"Texas","postal_code":"77304","latitude":30.3228,"longitude":-95.5298,"tz":"America/Chicago","lum_city":"conroe","lum_region":"tx"}}"
이는 페이지를 쿼리하는 데 사용하는 프록시 서버의 IP 및 위치 정보를 반영합니다.
결론
이 글에서는 Rust에서 프록시를 사용하는 방법을 배웠습니다. 프록시는 디지털 가면과 같아서 온라인 제한을 우회하고 웹사이트의 제한 뒤를 엿볼 수 있게 해줍니다. 또한 웹을 탐색할 때 익명성을 유지할 수 있게 해줍니다.
그러나 직접 프록시를 설정하는 것은 복잡한 과정입니다. 일반적으로Bright Data와 같이 400M+ monthly개의 사용하기 쉬운 프록시 풀을 제공하는 검증된 프록시 공급자를 이용하는 것이 좋습니다.